In alternative schooling and education, creativity is key. It’s essential to find unique and innovative ways to keep students engaged in learning while also creating a comfortable environment that fosters their development. One such creative solution is the use of crate seats.
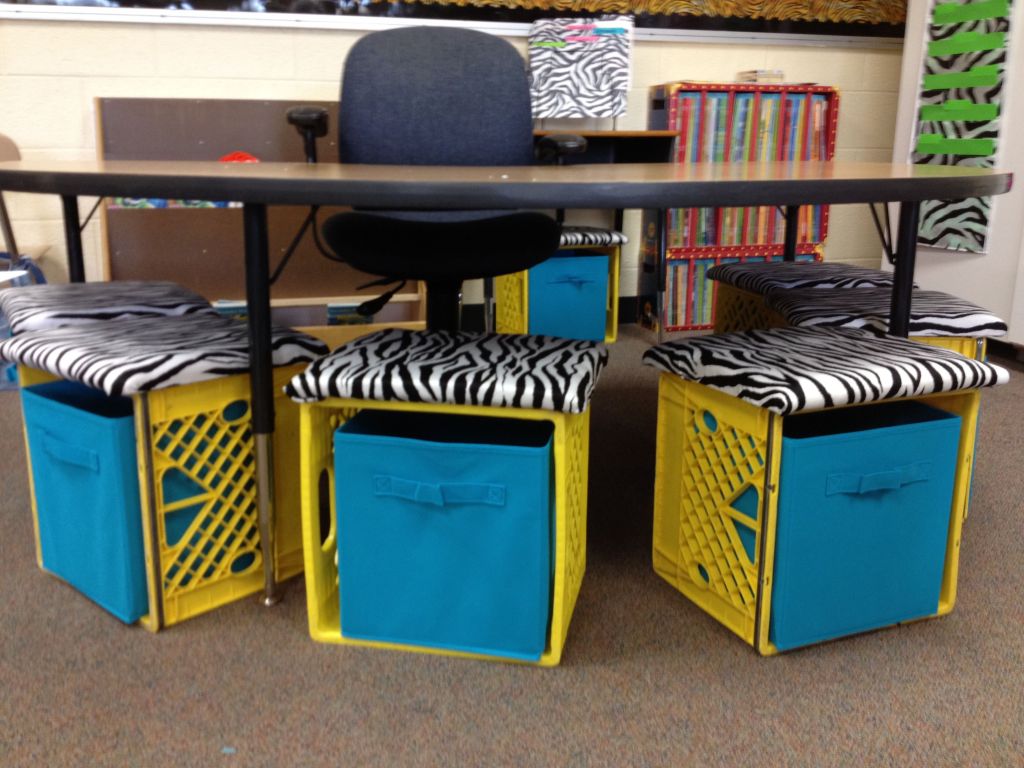
Crate seats are exactly what they sound like – seating made from crates. These seats can be found in various forms, but the most popular style involves stacking wooden crates on top of one another and securing them with screws or brackets. The result is a sturdy, functional seat that can double as storage space for books or supplies.
One of the main benefits of crate seats is their versatility. They’re incredibly easy to move around, making it effortless to create different seating arrangements depending on the activity at hand. They’re also very lightweight, which means they can be carried outside for an impromptu lesson under a tree or taken to another classroom if needed.
Another advantage of crate seats is their affordability. Traditional classroom furniture can be expensive, especially when you factor in how quickly children outgrow it or wear it down through daily use. Crate seats offer a cost-effective alternative that doesn’t sacrifice quality or comfort.
But perhaps most importantly, crate seats provide an opportunity for students to engage in hands-on learning and DIY projects while also promoting sustainability and environmental awareness. By repurposing old wooden crates instead of buying new chairs or stools, we reduce our carbon footprint and teach children about the importance of recycling and upcycling materials.
Creating your own crate seats can be a fun project for both teachers and students alike! Here are some steps you can follow:
1) Gather your materials: You will need wooden crates (usually 12x12x18 inches), screws (2-3 inches long), washers (to prevent splitting), brackets (optional), sandpaper (medium grit), paint brushes or rollers, primer/paint/stain/varnish
2) Sand down any rough edges on the crates (especially the top and bottom where they will be screwed together) to prevent splinters.
3) Paint, stain or varnish the crates in any color(s) you like. Be sure to use a primer first if painting over an untreated surface.
4) Once the paint has dried, stack two or three crates on top of each other and pre-drill holes for screws every few inches around all four sides of the crate. Insert screws with washers into each hole and tighten with a drill until secure.
5) If desired, add brackets to reinforce the structure even further. Attach them at the corners where each crate meets by pre-drilling holes for screws and then securing them in place with more screws (with washers).
6) Voila! You now have your own DIY crate seats that are perfect for alternative schooling and education environments!
Crate seats can also be customized in various ways to fit different needs or aesthetics. For example, you could add cushions or pillows on top of them for added comfort, or even attach wheels to make them easier to move around.
In addition to being used as seating, crate seats can also double as storage space for books, supplies or toys. Students can easily access what they need while also keeping their learning space organized and tidy.
Overall, crate seats provide alternative schooling and education environments with a unique solution that is versatile, affordable, sustainable and fun! Whether you’re creating your own DIY versions or purchasing premade ones from a vendor such as Etsy or Amazon Handmade – these seating solutions offer endless possibilities for creativity in teaching methods while promoting student engagement through hands-on learning experiences.

Leave a comment